Giving your business a presence in mobile app stores can be a great marketing tool, but creating fully native mobile applications can be a daunting task. Implementing all of your functionality in new native applications for each mobile platform requires significant resources, and often the return on investment is not immediately clear. What if you could have the best of both worlds: exposure in each platform’s app store, while leveraging the investment in your existing mobile-friendly website?
Creating a Windows Phone application that wraps your existing website is pretty straightforward. Prior experience with Windows development, C#, and/or XAML is helpful but not required. This post will show you how to install the Windows Phone development tools and create a basic Windows Phone application that wraps your existing website.
Development Environment Setup
You’ll need Windows 8 (x64) Professional or Enterprise. I’d recommend against using a virtual machine, as the emulator used for testing your Windows Phone applications may not function properly if used inside a VM. Though, depending on the VM platform you are using, there may be workarounds (e.g. for VMWare and Parallels).
Steps for installation:
- Download and install Windows Phone SDK 8.0
- This also installs VS Express 2012, a free version of Visual Studio
- Additional SDK downloads are available, but note that in order to target both Windows Phone 7 and 8, the 8.0 SDK with VS2012 must be used. The 8.1 SDK with VS2013 cannot target WP7.
- This installer will take a while to run, and may require a reboot
- Download and install Visual Studio 2012 Update 4
Creating the Project
VS2012 has a built-in project template for a simple application that displays local HTML content. We are goign to start with that template, then modify the project to load your content over the internet.
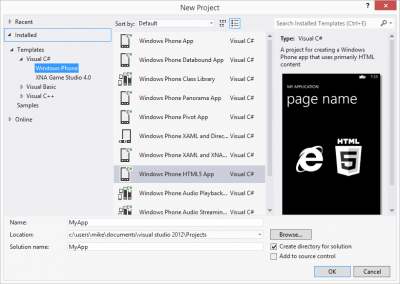
First, open VS2012 and create a new project (File -> New -> Project). Select the Windows Phone HTML 5 App project template, give your project a name, and click OK.
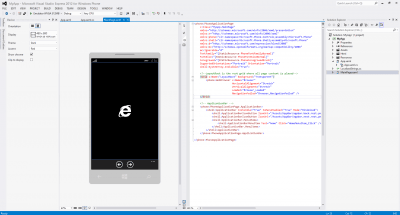
Here’s what the resulting project should look like.
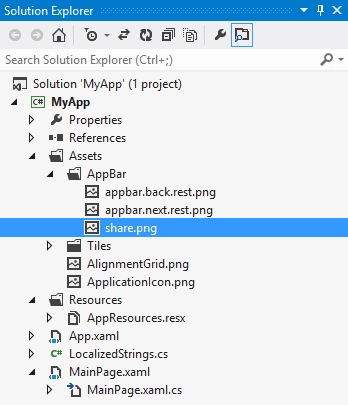
The Solution Explorer pane shows the file structure of the project. Some notable files include:
- MainPage.xaml: The XAML UI layout for the main page of your application. The two most important elements in your MainPage.xaml are:
- phone:WebBrowser: The embedded web browser that will be rendering your website
- phone:PhoneApplicationPage.ApplicationBar: The menubar at the bottom of the application that is currently showing Forward/Back navigation arrows
- MainPage.xaml.cs: The “code-behind” for the MainPage.xaml file, containing the C# code triggered upon certain application events
- Properties/WMAppManifest.xml: Allows you to define certain properties of your application, such as icons, supported resolutions, titles, etc.
Change Project to Use Your Website
Currently, the project is set up to serve local HTML content from the project’s Html folder. We can change the project to instead serve your website with the following steps:
- In Solution Explorer, delete the Html folder
- In MainPage.xaml, change
MainUritohttps://your_web_site_url.example.com - In MainPage.xaml, change the two usages of
UriKind.RelativetoUriKind.Absolute
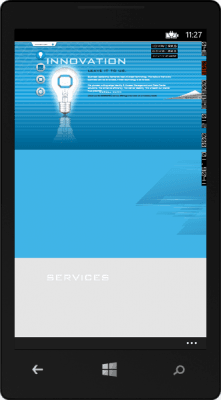
You can now press F5 to load a Windows Phone emulator and launch your application.
That’s it! You now have a native Windows Phone application that wraps your mobile site. Next, let’s look at how you can add additional functionality, if desired.
Add a Share Button
Many Windows Phone applications have a Share button that allows you to easily share some content from the current application via text message or social network. Let’s look at how we can implement this in our applicaton.
Step 1: Add the Share icon to your project
- Locate the icon at [ProgramFiles]Microsoft SDKsWindows Phonev8.0IconsDarkshare.png
- Drag and drop the file into the Assets/AppBar folder in your solution in Visual Studio
Step 2: Change the App Bar to start un-minimized
In MainPage.xaml, locate the shell:ApplicationBar element, and change the value of Mode from Minimized to Default
Step 3: Add the Share button to your App Bar
In MainPage.xaml, locate the shell:ApplicationBar element, and add a new shell:ApplicationBarIconButton element to it as follows:
shell:ApplicationBarIconButton
  IconUri="/Assets/AppBar/share.png"
  IsEnabled="True"
  Text="Share"
  Click="ApplicationBarIconButton_Click"/>
Your new button should now appear in the App Bar in the Design pane
Step 4: Trigger the Share action when the button is clicked
In the previous step, Click="ApplicationBarIconButton_Click" indicates that when the button is clicked, a method named ApplicationBarIconButton_Click in MainPage.xaml.cs will be executed.
Add the following method to MainPage.xaml.cs:
private void ShareApplicationBar_Click(object sender, EventArgs e) { Microsoft.Phone.Tasks.ShareLinkTask shareLinkTask = new Microsoft.Phone.Tasks.ShareLinkTask() { Title = "Title Text", LinkUri = Browser.Source, Message = "I wanted to share this with you" }; shareLinkTask.Show(); }
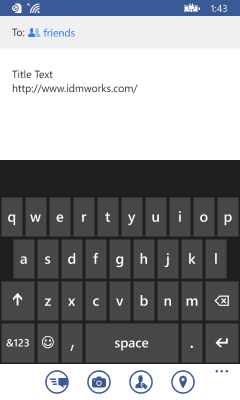
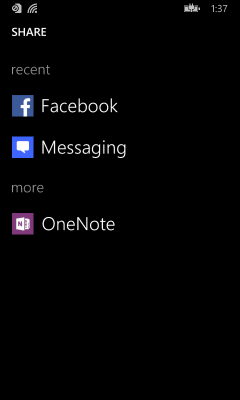
This triggers Windows Phone’s built-in sharing functionality, allowing your user to share the URL of the current webpage via text message or social network. (Note that sharing cannot be tested on the emulator; an actual device must be used.)
Future Work
Now that you have a working application… what should you work on next?
Test on an actual device
While the emulators are convenient, you’ll definitely want to be able to test on actual devices from time to time. Luckily, you don’t have to break the bank; you can buy a no-contract Nokia Lumia 520 for as little as $30, and it’s a perfectly fine WP8.1 phone.
After acquiring a phone, you’ll need to register it with Microsoft before you can deploy applications to it.
Download additional emulators
The WP8.0 SDK provides several emulators running WP8.0 for various resolutions, but you’ll want to test your application on different OS versions to ensure compatibility. Head over to Microsoft’s SDK download page to download packages of additional emulators.
Windows Phone 8.1
WP8.1 provides new APIs and features for developers (Microsoft provides a couple good rundowns here and here), but making use of them in your application can introduce compatibility issues with WP7. There are some tricks to make the compatibility issues a little less painful, but you’ll want to do your research before jumping in.
Submit to the Windows Phone Store
Once you’re happy with your application, you can submit it to the Windows Phone Store. This will require a paid developer account, which typically has an additional cost, but may be included with your MSDN subscription, if you have one.
and customers.

