

In the OIM/OAM 12c bundle patch 12.2.1.3.180413 Oracle released a script to complete the integration between OIM, OAM, and OUD using the OUD connector (like LDAPSync in PS3).
You can see the full documentation for the configuration at the link click here. This script is meant to be a one-click approach of integrating all the utilities, but when deploying it, there are nuances encountered to get it up and working fully. This post will go through the high-level steps to perform along with post-integration steps to secure the environment, given the limitations of the script. This is a good way to get this working and integrated into a new environment without having to do a PS3 install (with LDAPSync) then having to upgrade to 12c.
High-Level Steps
To complete the integration, the steps documented below MUST be followed in order. Here’s each step at a high-level:
- Configure OIM Domain: do base domain configuration and enable SSL / TLS for secure access to component
- Configure OUD / Domain: do base domain/instance configuration and enable SSL / TLS for secure access to the instance
- Configure OAM Domain: do base domain configuration and enable SSL / TLS for secure access to components
- Setup OHS and URLs to host the OIM and OAM components for high availability
- Update the configuration script properties file
- Run the pre-requisite updates to OIM domain/configuration
- Run the prepareIDStore scripts
- Run the OIG integration script
- Run the OAM configuration script
- Deploy the webgate
- Secure / change to SSL for all domain components
- Test, validate, and have fun with your new 12c integrated environment!
For reference in this post, all configurations and examples are done in our local lab using a high-availability cluster of OIM, OAM, and OUD running on different hosts. Each host is running CentOS 7, JDK 1.8, and shared database repository in an Oracle database cluster. I also have F5 load balancers in place for secure SSL and load balancing of components.
NOTE: in JDK 1.8, unsecure SSL methods are disabled so will cause issues during the run of the script if you try to use secure ports. You need to run the configuration using non-SSL ports then update the domain/configurations after to use secure access.
OIM Pre-Requisites Configuration
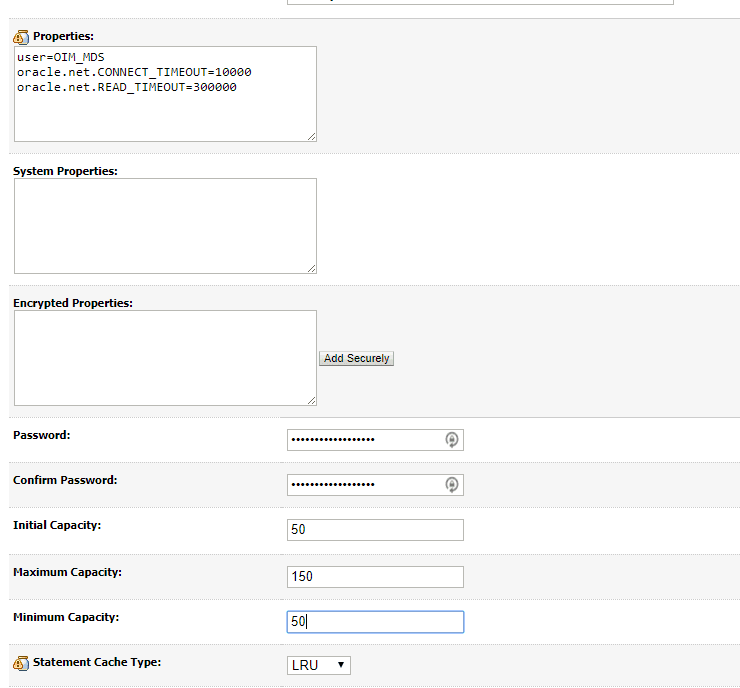
When all the components are up and running in an HA configuration, take a backup of the different domains, configurations, and database (so you can easily roll-back if needed). Once this is done, go through the pre-requisites at the link click here. To begin, log in to the OIM domain and go to the oim-mds data source.
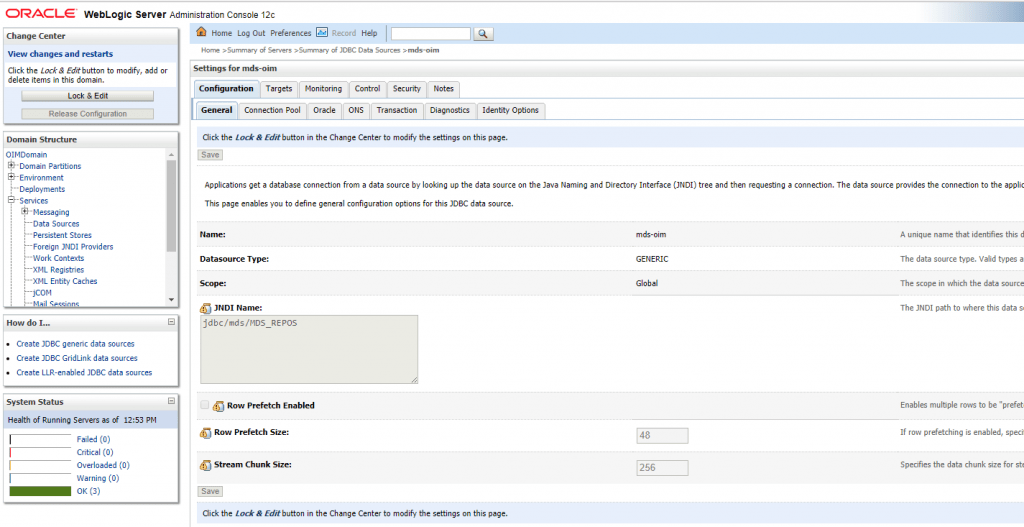
Update the connection capacity settings and timeout per the documentation.
Once done, restart the OIM domain. When OIM is back up and running, copy over the OUD connector files to the connector directory.

Unzip the connector files.
![]()
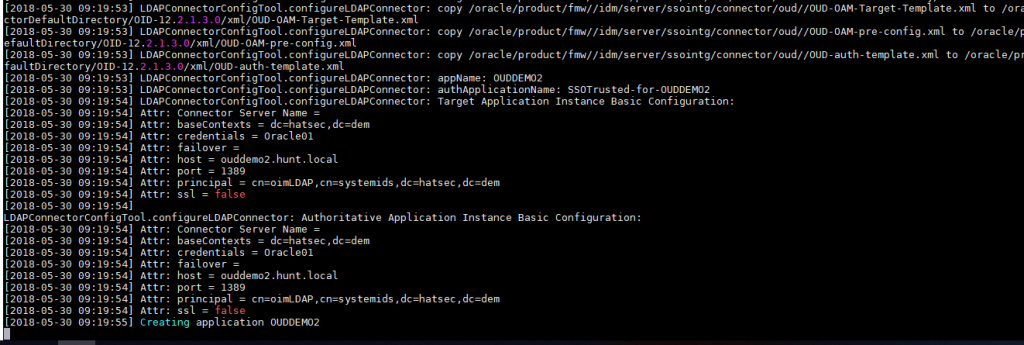
Move the files in the xml directory per the documentation.

Update target template file version per the documentation.
![]()
![]()
Update the auth-template version information.


![]()

Update the pre-config version information.
![]()
Running the Integration Script
On the OIM host/middleware home, change to the $ORACLE_HOME/idm/server/ssointg/config directory and backup the default ssointg-config.properties file. Once you have the file backed up, update the properties file with your environment information.

There are a lot of changes and updates to make in the file. Be sure to select the correct information for each of the changes. ALSO NOTE, be sure to use non-secure ports for all the services, for now; you’ll update to use SSL after the configuration is completed.
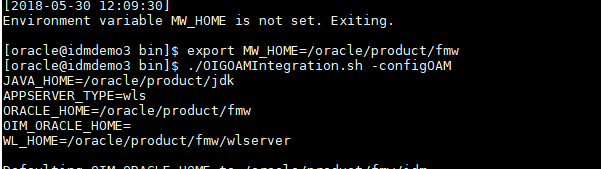
Set environment variables to use for the script (on the OIM host).
![]()
![]()
To begin, run the script to prepare the ID store.
![]()
Once this is done, you can update the script to not allow the configuration of the ID Store by updating the below.
![]()
Once this is completed, restart the OUD instance to pick up the changes and additional information in the configuration.
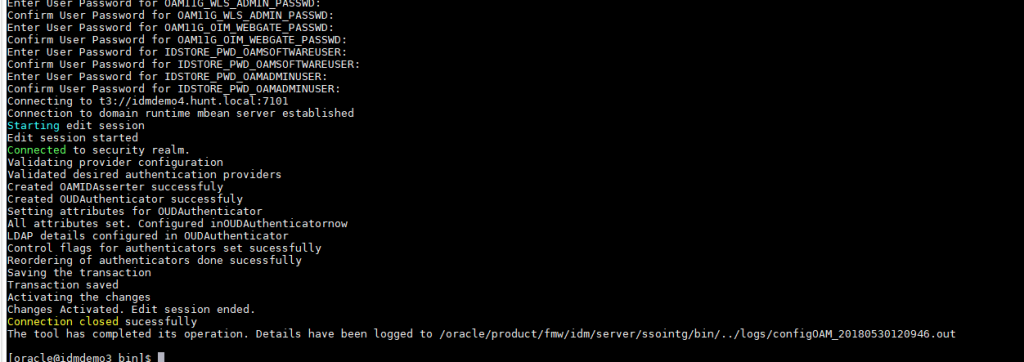
Run the configuration script with the ‘-all’ option to begin the configuration of OIM and OAM.

Note: It will sit for a while at the app instance deployment during the configuration.
Once the script completes, you will get a success notice when completed.
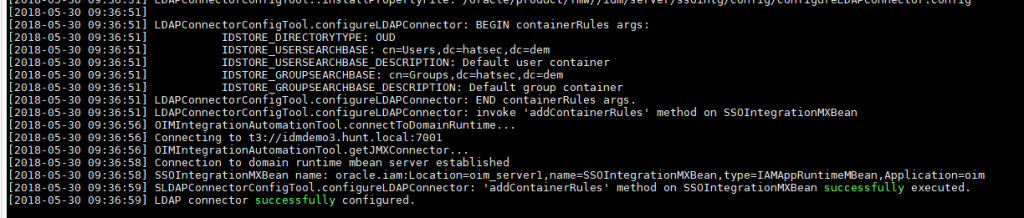
You can review the logs in the logs directory.
![]()
Restart OIG / OAM domains (full restart).
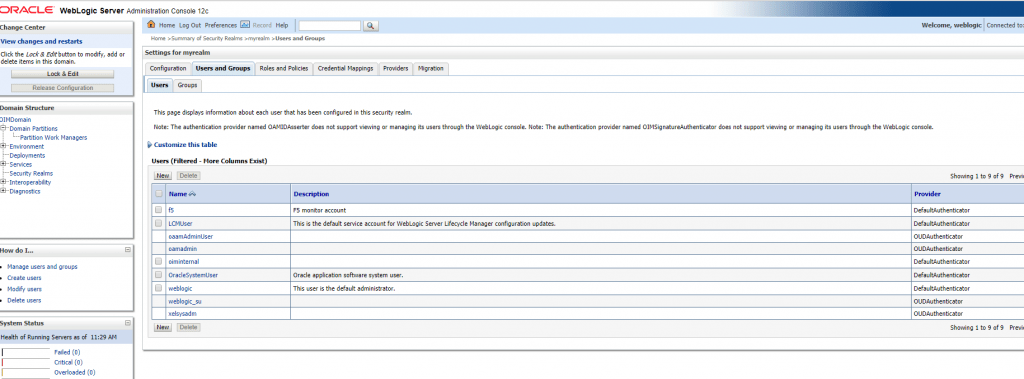
Post reboot, login to oudsm for OUD and delete the user ‘weblogic’ since this will cause startup failures in the OIM domain (see below).

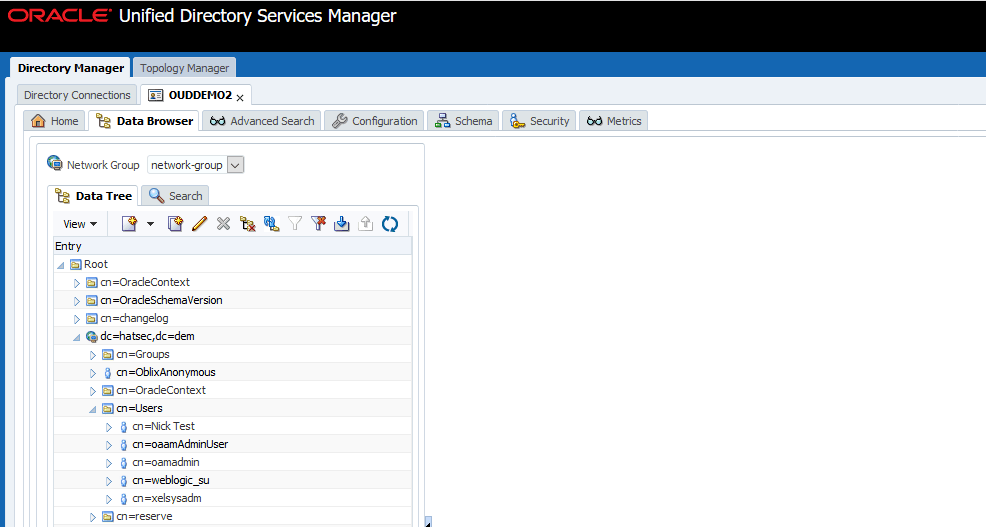
Post reboot validation in the OIM domain can be done by looking at the user list under Security Realms. If you can see the OUD users, then the domain is connecting to OUD successfully using the connection.
Start OIM domain servers (SOA and OIM).
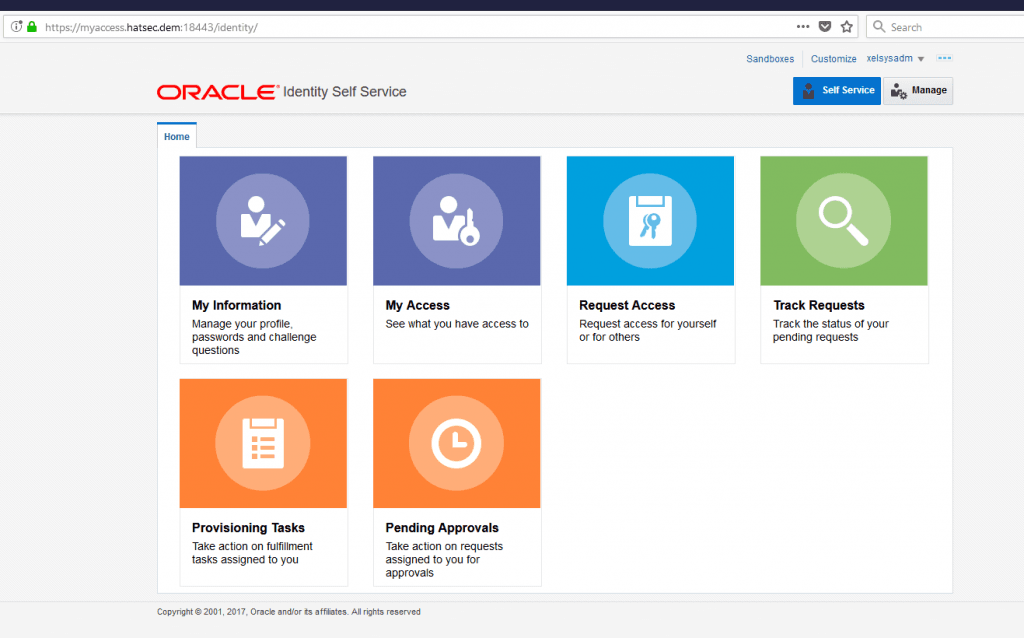
Post reboot, you can log in to OIM with xelsysadm account from the OUD directory.
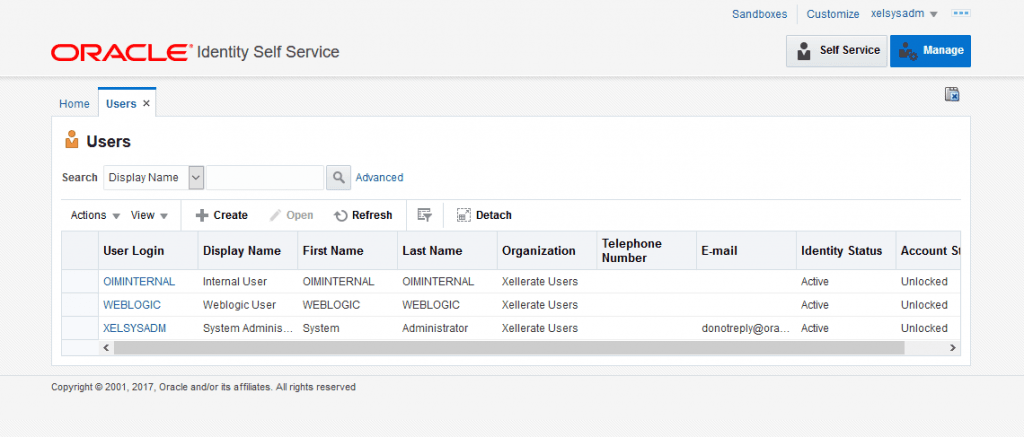
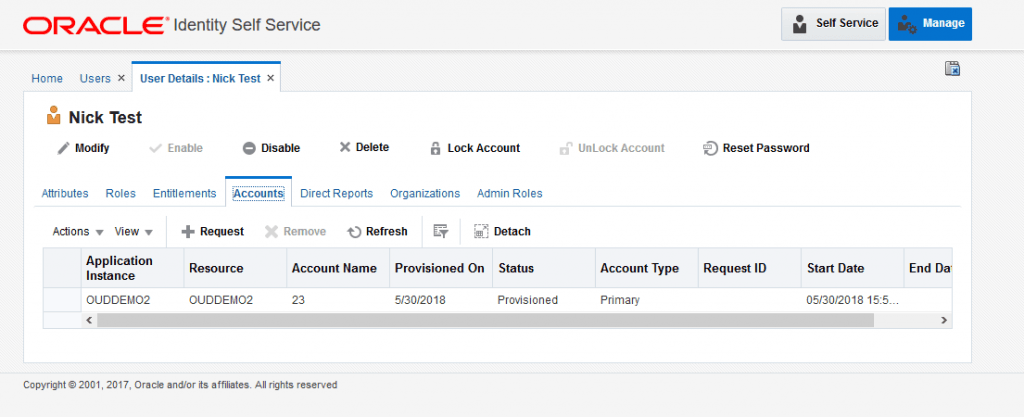
You can now create accounts and see them provisioned to the directory.
Once this is done, run the same script to do the OAM configuration with the below options.
You will receive a success message when done.
At this point, restart the OAM domain. Log in to the console post-reboot and use the admin account.
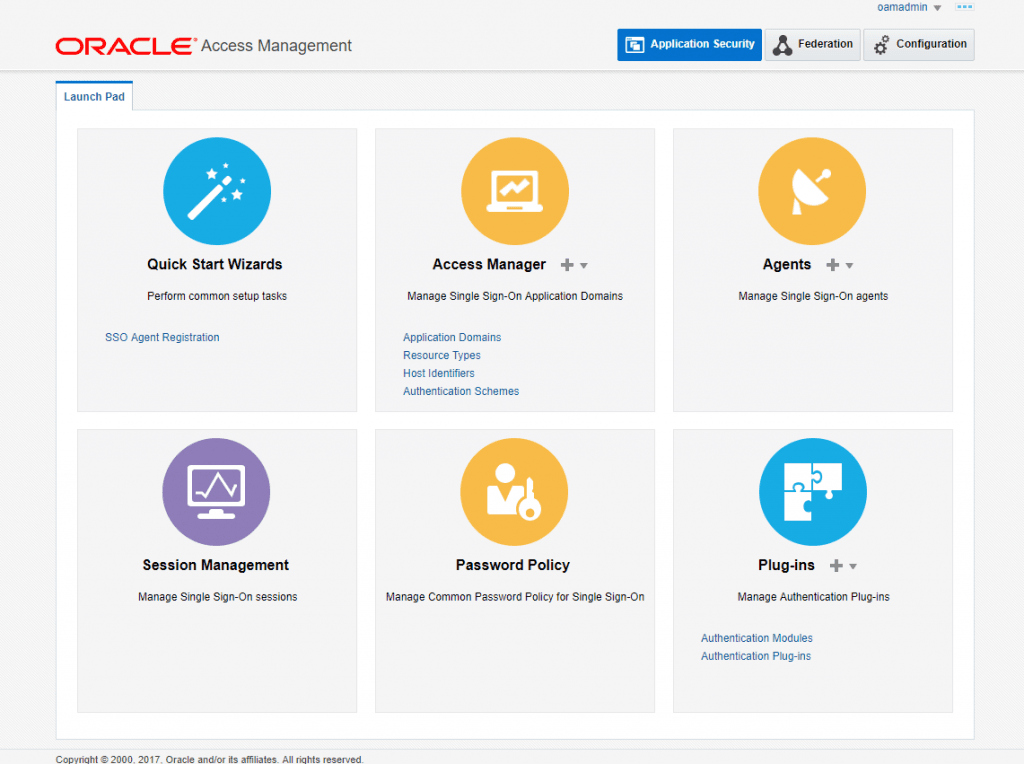
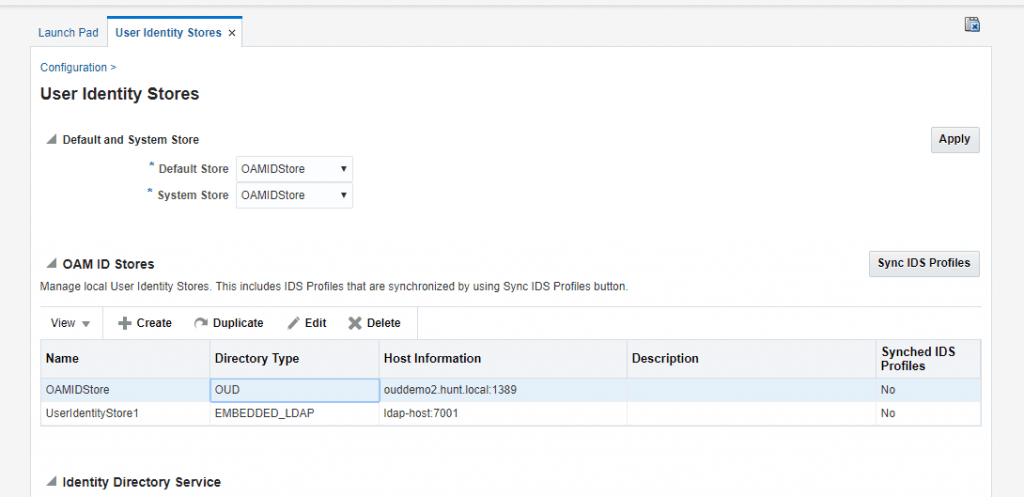
You can now see the IdentityStore configuration when you go to Configuration > Identity Stores.

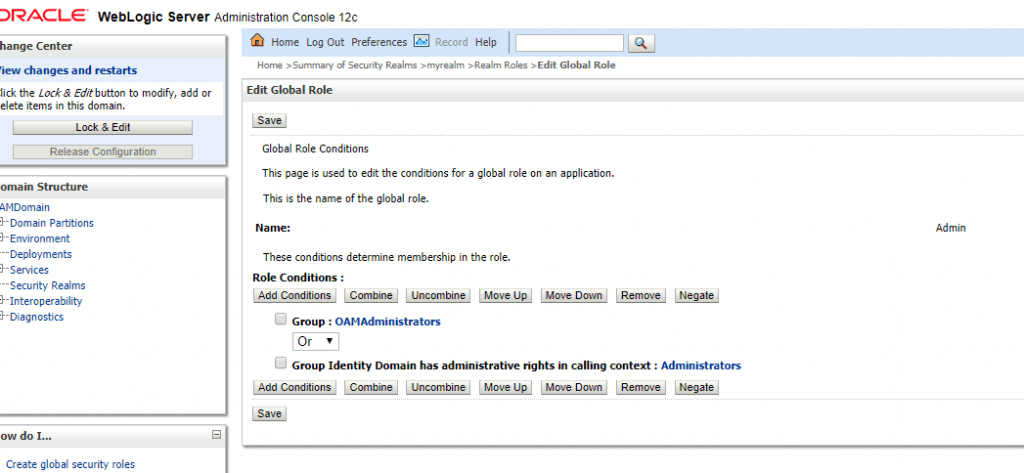
When you do this, you will get a permission error (similar to older versions of OAM). To fix this, update the global policies in the OAM domain to include the OAMAdministrators group in the global admin role.
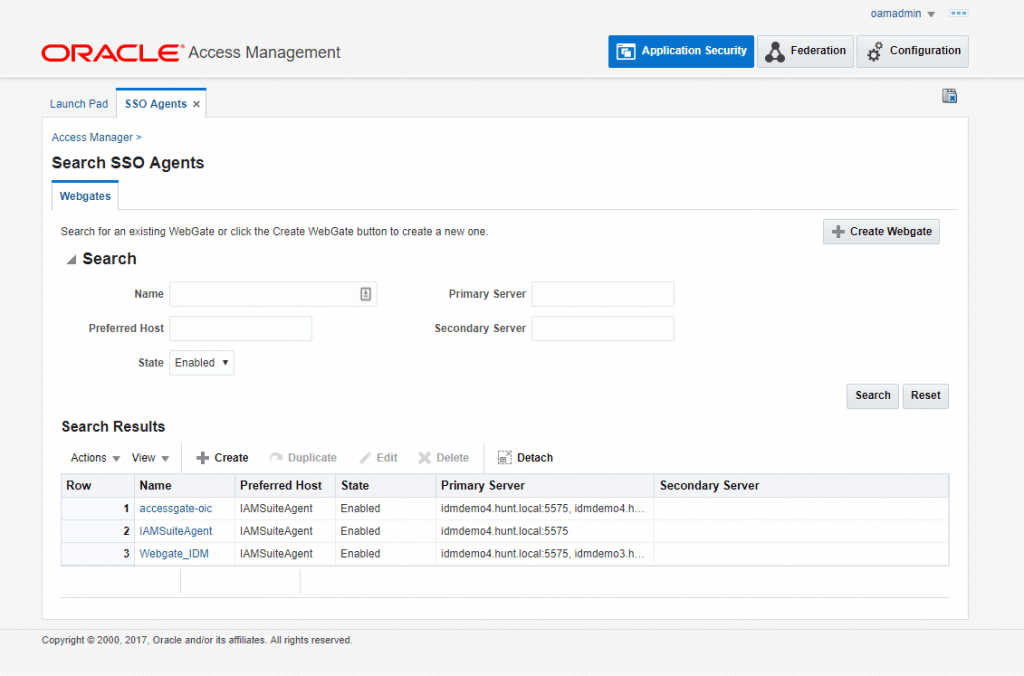
Once this is done, you can now see the Webgate_IDM agent configuration in the agent configurations.
Copy over the artifacts for this to the OHS server and webgate configuration.

Deploy the webgate files to the OHS instance configuration.
![]()
Edit the httpd.conf to include the webgate configuration.
![]()
Once this is done, copy over the webgate artifact files to the instance directory.

Restart OHS when this is complete.

Validate the login/integration by accessing the OIM frontend URL. You should be directed to the OAM login page.
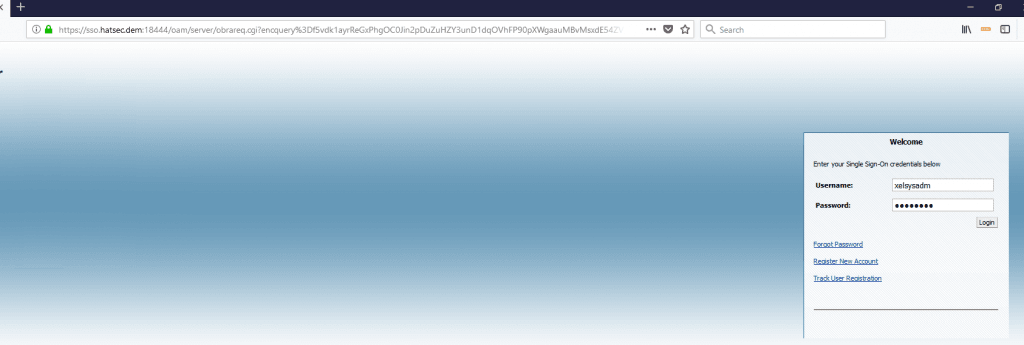
Once you log in, you should now see the OIM home page.
NOTE: You will need to make sure SSO is enabled on other OIM managed servers (beyond the first node) since the configuration script only updates the first node/server specified in the configuration script.
Enabling SSL for All Components
Since JDK1.8 requires more secure SSL protocols, you need to update OUD to support TLSv1 before you can begin the configuration. This should be supported using the jvmproperties script, but was not picked up in the updates so had to manually enable this by updating the OUD config.ldif script. To enable this, update the config.ldif with the below options.

Once this is done, restart the OUD instance and validate TLSv1 is enabled using openssl command below.
![]()
Will get a success knowing it is enabled.
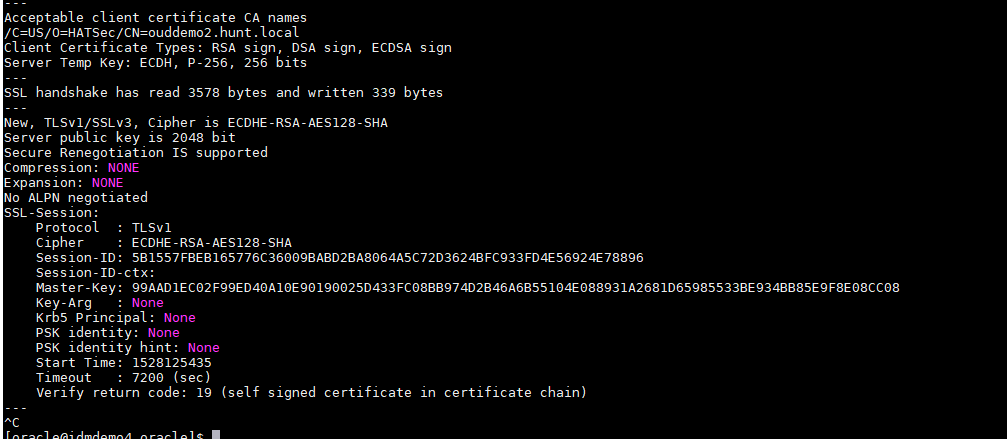
NOTE: this is only done since there is a TLSv1 Hello status message that is sent, further down, TLSV1.1 and TLSV1.2 are enforced for other connections.
Now you need to enable SSL for the OUD connections to make it secure in the OAM Identity Store configuration for OUD.
In OAM, go to the directory server configuration for identity stores and change to 1636 / SSL for the connection.
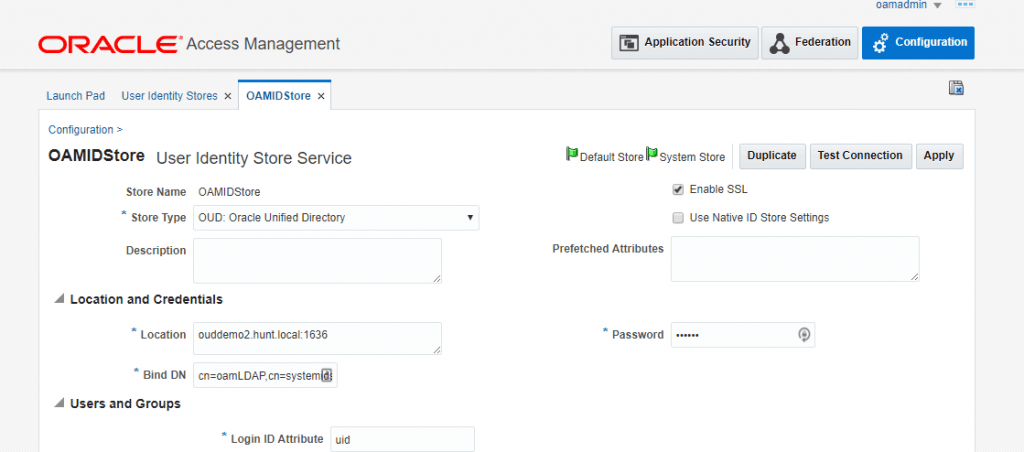
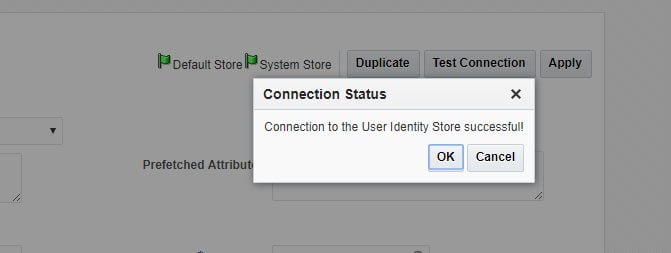
Validate the connection by testing the connection.
Stop the OAM servers and policy manager servers. Keep the admin server up for the time being.
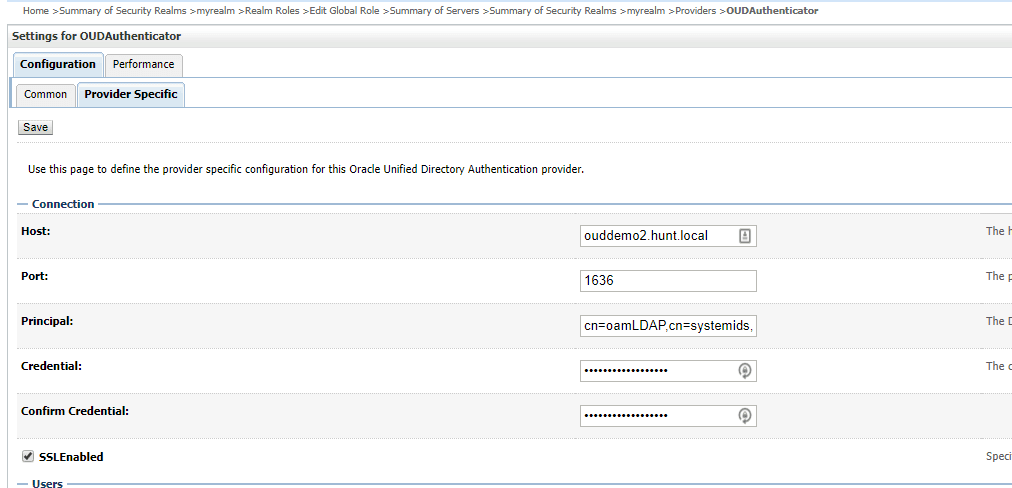
In the provider configuration in the realm, update the OUDAuthenticator to use SSL.
Save and activate the changes then shutdown the admin server. In the domain home bin directory, create a new script named setUserOverrides.sh and give it execute permissions.
![]()
In the script, add the below lines to enforce the TLS version to use in the domain along with disabling the SSLV2Hello status message for TLS connections.
# these are custom java options to help with the ssl issues
JAVA_OPTIONS=”-Dweblogic.security.SSL.enableJSSE=true -Dweblogic.ssl.JSSEEnabled=true $JAVA_OPTIONS”
#JAVA_OPTIONS=”-Dssl.debug=true -Djavax.net.debug=all -Dweblogic.StdoutDebugEnabled=true $JAVA_OPTIONS”
JAVA_OPTIONS=”-Dweblogic.security.SSL.ignoreHostnameVerification=true $JAVA_OPTIONS”
JAVA_OPTIONS=”-Dhttps.protocols=TLSv1.1,TLSv1.2 $JAVA_OPTIONS”
JAVA_OPTIONS=”-Djdk.tls.client.protocols=TLSv1.1,TLSv1.2 $JAVA_OPTIONS”
JAVA_OPTIONS=”-Dweblogic.security.SSL.minimumProtocolVersion=TLSv1.1 $JAVA_OPTIONS”
JAVA_OPTIONS=”-Dweblogic.ssl.SSLv2HelloEnabled=false $JAVA_OPTIONS”
JAVA_OPTIONS=”-Djdk.tls.disabledAlgorithms=SSLv3,TLSv1,SSLV2Hello $JAVA_OPTIONS”

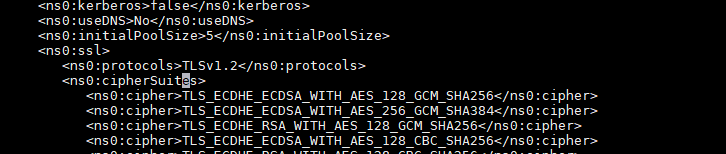
Once this is completed, in the adapter_os.xml, enforce the TLSv1.2 protocol in the libOVD adapter by updating the below.

Start the admin server for the OAM domain. Once started, you can validate SSL/TLS is working by going to the security realm and viewing the users and groups from the OUDAuthenticator.
Once OAM has been validated, OIM needs to be updated/configured to handle SSL as well.
To begin, set the user overrides for the domain so that the proper TLS info is being used for the environment. Setup this by creating the setUserOverrides.sh (similar to the OAM domain configuration).

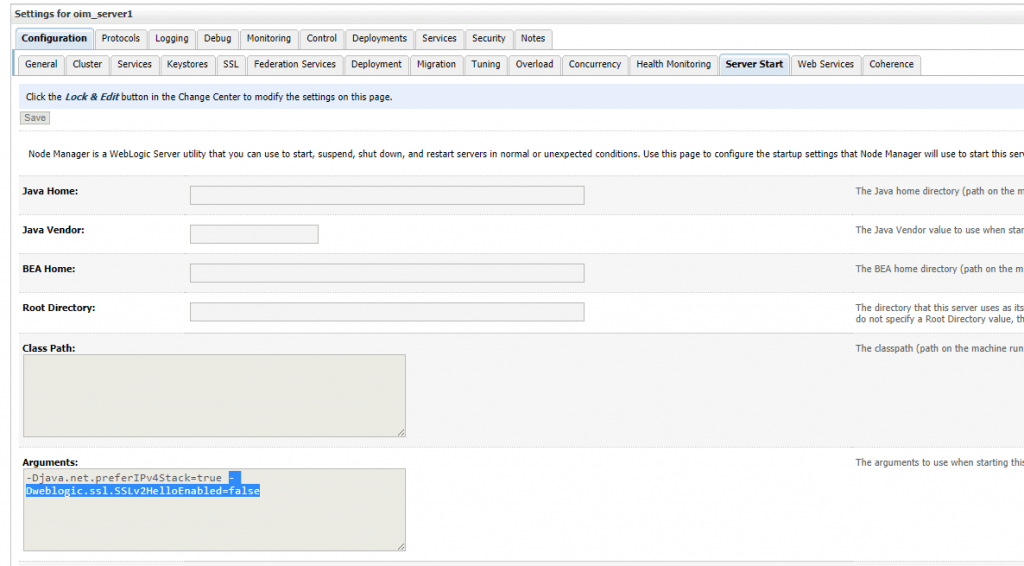
Additionally, in each of the managed servers in the OIM domain, add the below parameter to the ‘Server Start’ options (when using WebLogic console/node manager to start the domain).
-Dweblogic.ssl.SSLv2HelloEnabled=false
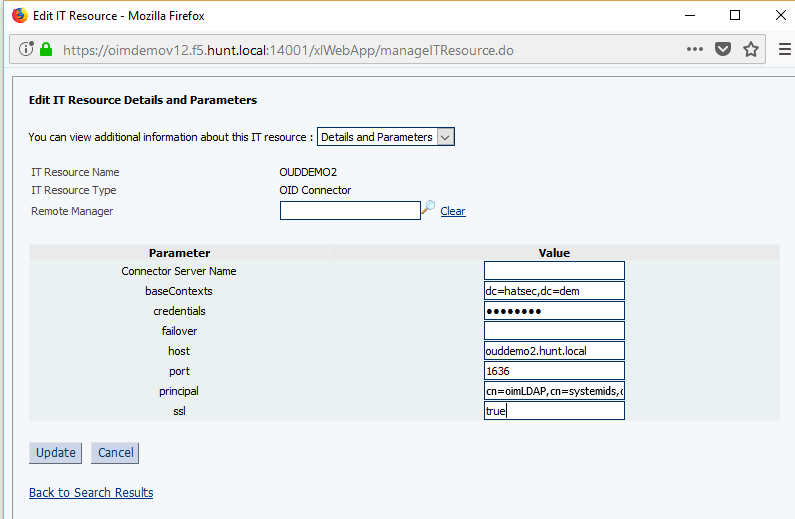
In the OIM sysadmin console, go to the OUD IT resource configuration and change the information to enable SSL. Change the port to the SSL port and also set ssl to ‘true’.
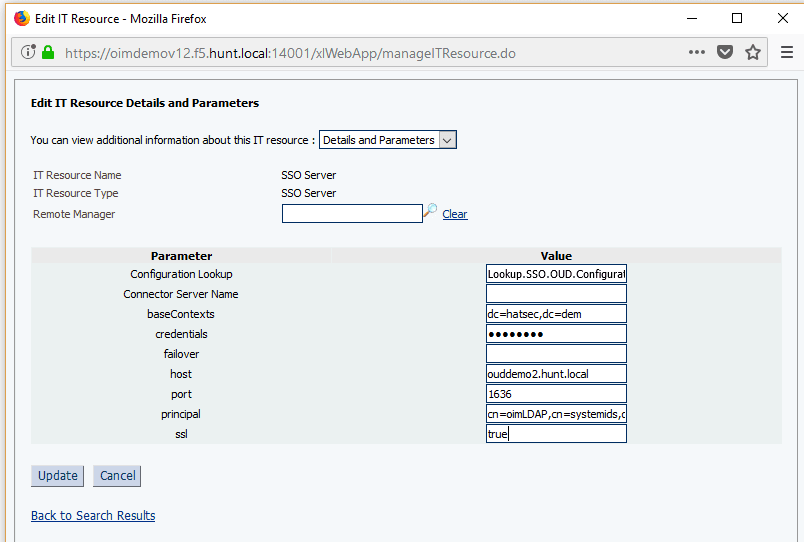
Also, update the ‘SSO Server’ IT resources to use SSL similar to the OUD IT resource configuration.
Once this is done, shutdown OIM / SOA but leave the admin server running. In the domain, update the OUD authenticator to enable the ssl configuration.

NOTE: by default, the configuration script uses the default admin account for the OIM provider configuration. Update this to use the oimLDAP account information (similar to the IT resource).
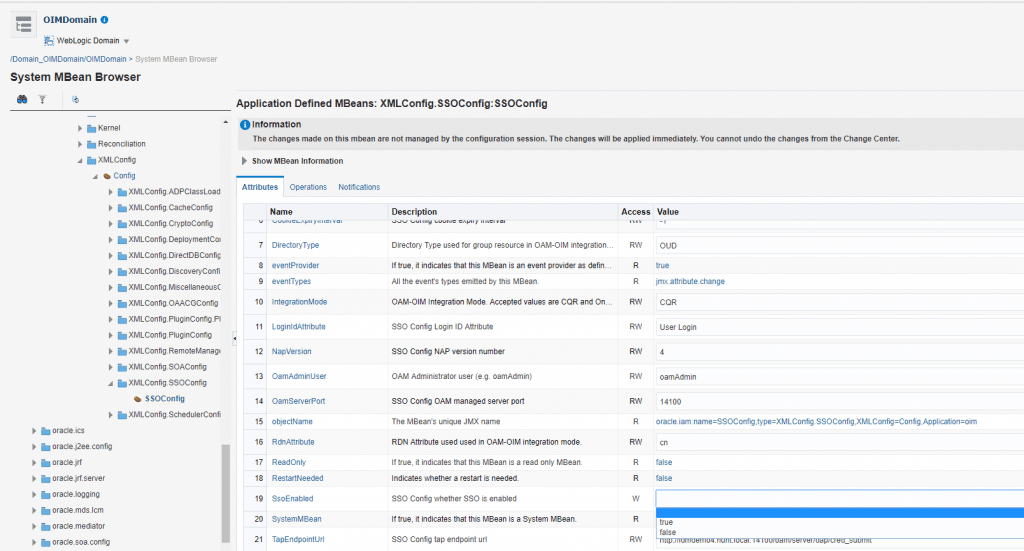
Once this is done, stop/restart the admin server. Once the admin server is restarted and OIM is up and running, log back into the SSO configuration MBean and update the OAM TapEndpoint URL to use the OAM SSL URL.


Restart OIM cluster when complete to pick up the additional changes.
At this point, test and validate the configuration is working as expected.
Conclusion
With the above configuration, you can utilize the OUD connector in OIM along with integrate OIM/OAM for SSO in 12c without having to configure a PS3 environment and upgrade to 12c. Additionally, since SSL/TLS does not work as planned in the configuration, you can enable the secure connection configurations in the domain to protect the information between the components.