
This article will lead you through IDMWORKS’ insight on how to convert the Oracle Identity Governance Challenge task into an Approval flow once the access revocation request is raised through Certification campaign workflow.
What is an OIG 12c Challenge Task?
The challenge task is a human task which gets triggered during a Certification campaign review when an access revocation request is raised for Application/Entitlement/Role. The human task gets triggered with the beneficiary whose access revocation has been requested through the Certification campaign.
The OOTB configurations occur once the Certification campaign is triggered and sent to the reviewer and if the reviewer validates that there is a non-compliant access provisioned to the user. They will request revocation of that access from identity <provided closed loop remediation is checked in Certification configurations>. Once the revocation request is triggered from the certification campaign, there will be a challenge task that will be triggered to the beneficiary user whose access is requested for revocation post – certification campaign review.
In this article you will learn how to nullify the challenge task and directly revoke an access of an identity once it’s triggered through Certification campaign.
Pre-Requisites
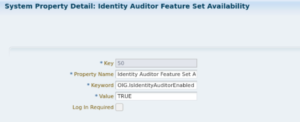
In order to create the SOD policies in OIG 12c, first you need to make sure that Compliance Tab is enabled by marking the Configuration Properties named as “Identity Auditor Feature Set Availability” is set to “TRUE” and OIM servers are restarted post the mentioned changes. Refer to the screenshot below:
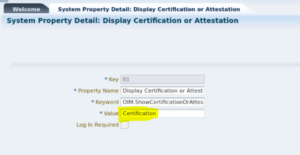
Next, the Configuration Properties named as “Display Certification or Attestation” should be set to “Certificate”.
Changing Challenge Approval to Auto Approval
This blog article will the steps on how to convert closed loop remediation in Oracle Identity Goverance (OIG) from challenge-based approval to auto approval.
- Login to Identity – System Admin Console using XELSYSADM user.
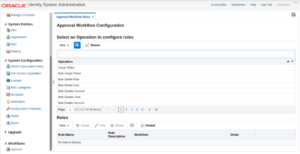
- Click on Approval.
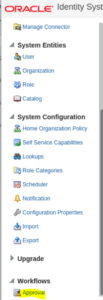
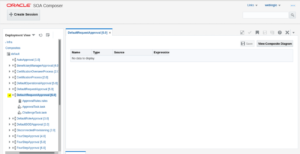
3. Upon clicking on Approvals, the page shown below will be displayed.
 |
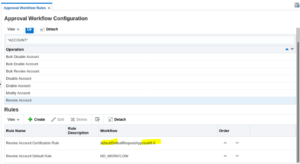
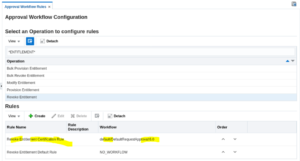
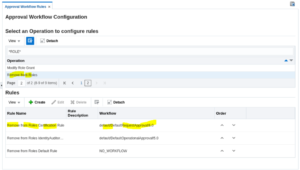
4. Check the Composite which is configured against the following 3 operations & rules. Refer to the table below:
| Operation Name | Rule Name |
| Revoke Entitlement | Revoke Entitlement Certification Rule |
| Remove from Roles | Remove from Roles Certification Rule |
| Revoke Account | Revoke Account Certification Rule |
5. In this example, the composite which is configured is: DefaultRequestApproval!6.0.
 |
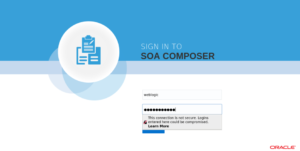
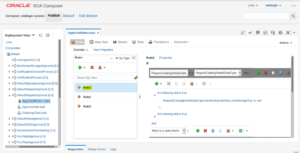
6. Log-in to the SOA Composer using the URL : https://<HOST_NAME>:<SOA_PORT>/soa/composer

7. Log-in using weblogic user credentials.
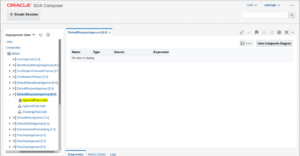
8. The landing page below will be displayed.
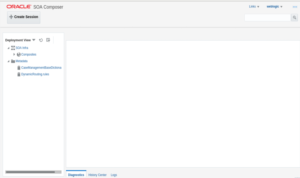
9. Expand the Composites.
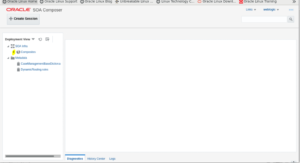
10. The page below will be displayed.
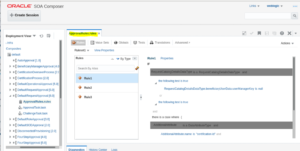
11. Expand on the Composite which is identified in Step # 5 i.e., DefaultRequestApproval!6.0.
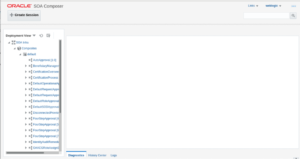
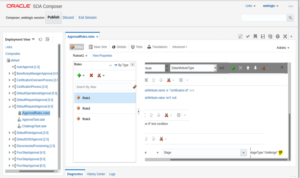
12. Click on ApprovalRules.rules.
13. Once mentioned rule is clicked on, the view below will be displayed.
14. Click on Create Session button so that the required changes in the rule can be made.
15. The session will be activated successfully.
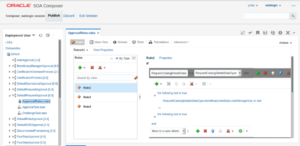
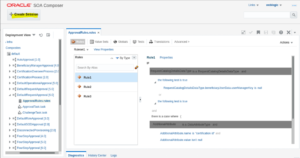
16. Make sure Rule1 is selected.
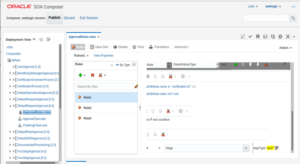
17. Scroll down on the Rule1 and check the “THEN” block.
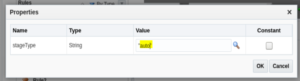
18. In THEN Block, find the stageType set as “challenge”.
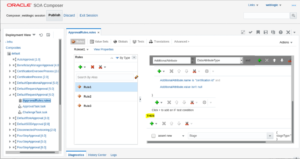
19. Change the stageType from “challenge” to “auto” by following the below steps.
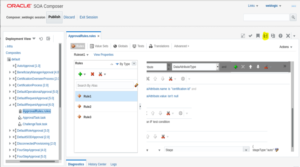
20. Click on Edit button.
21. The popup below will be displayed.
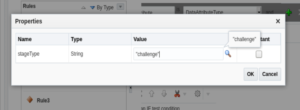
22. Change the value to “auto”.
23. Click on OK.
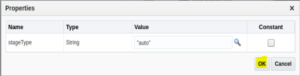
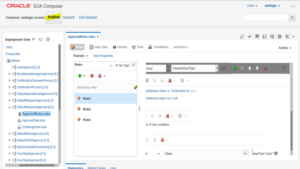
24. The stageType will be changed to “auto”.
25. Save the changes in Rule1.
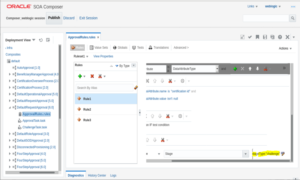
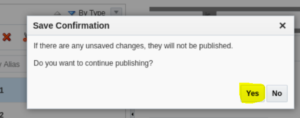
26. Once the changes are done then the changes will need to published.
27. When the popup below is displayed, click on “Yes”.
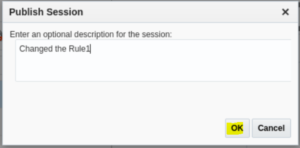
28. Enter a proper description to publish the changes and click on OK.
29. The changes will be published successfully.
By performing the above changes during the access review through certification campaign – if you revoke any Account/Entitlement/Role during certification campaign then no challenge task will be triggered with the beneficiary user, but it will be auto-approved and access will be removed/revoked directly without any challenge task getting invoked.